This post may contain affiliate links, read our Disclosure Policy for more information. As an Amazon Associate I earn from qualifying purchases, thank you!
How to Make Christmas Spritz Cookies
One of my most favorite Christmas cookies to binge on are these spritz cookies! They just melt in your mouth! They are also so fun to do and we make them every year as a Christmas tradition. We fill 10+ Christmas tins with them and deliver them to neighbors. Make sure to also try our best Sugar cookie recipe, Christmas shortbread cookies, and Peanut butter blossoms!
What ingredients do I need to make spritz cookies?
You will need a cookie press to make spritz cookies! I used the OXO Good Grips cookie press but you can use any kind, I especially love the vintage old ones!
After you fill the cookie press with the spritz cookie dough, press firmly onto the baking sheet and lift.
If you want to add sprinkles to the cookies, do it right out of the oven so they stick!
BAKER’S NOTES:
Follow along on Facebook, Twitter, Pinterest and Instagram for more Heavenly Recipes.
Preheat your oven to 375 degrees F.
In a large mixing bowl, with a hand mixer, cream the butter and the granulated sugar together.
Add the egg, the vanilla extract, and the salt. Mix until combined.
Add the flour. If using a hand mixer, make sure it is on low and slowly add the flour in increments of ¼ to ⅓ cup. Doing it this way the flour will mix easier and not go everywhere. As soon as you don’t have any dry flour add more flour. If mixing with a wooden spoon you can add more flour.
Once the batter is all mixed, it will be thick, place it in the cookie press.
Put the cookie press on the baking sheet. Press down and lift.
Repeat until all the sheet is full.
Cook in a preheated oven for 6 to 8 minutes or until the edge of the cookies are set and slightly brown.
Transfer the cookies to a cooling rack.
Decorate with sprinkles or colored sugars.
Serve and Enjoy with a glass of milk, eggnog, or even tea!
Storage: Store the cookies in an airtight container on the counter for 1 week, and in the fridge for up to 2 weeks.
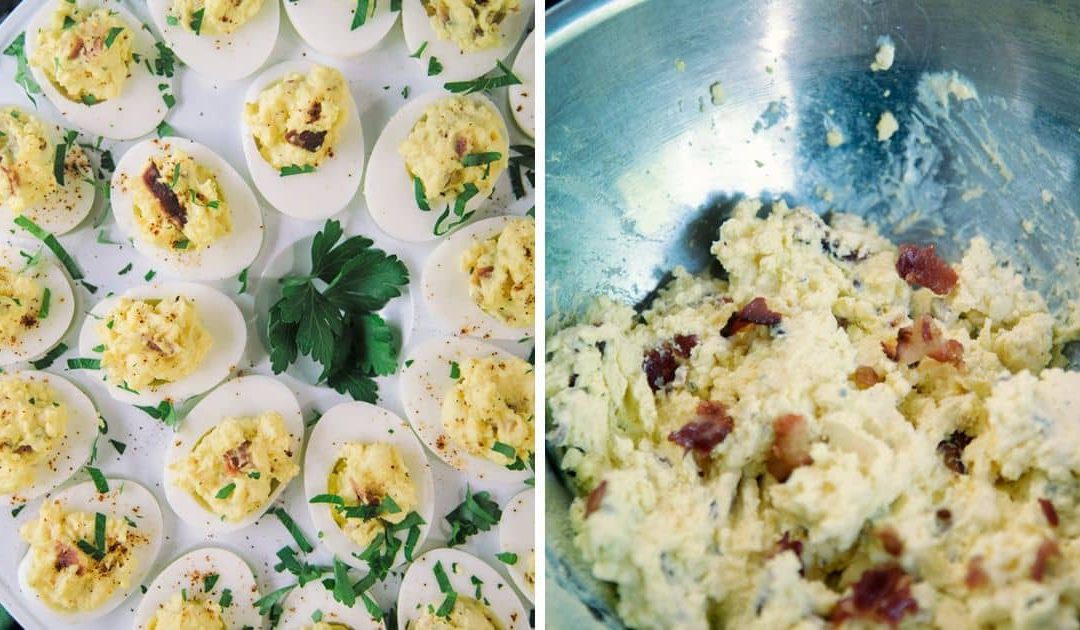
Deviled eggs are classic little things that can be spiced up in a medley of ways. In the end, you can always top them off with fresh dill, salmon, sausage, pulled pork, , horseradish, cauliflower hummus… Of course, not a pile of ingredients at once; just take it one egg at a time.
Plus, there is no right or wrong way to create them, making them the perfect recipe for beginners and advanced cooks alike. But wait, we missed an ingredient. Bacon. You can never go wrong with streaky bacon.
With eggs as the main ingredient, you are going to want to source the best possible – after all, the quality of the bird’s feed and living environment reflects the quality of nutrition you receive from the egg.
Eggs from free-ranging chickens are much higher in omega-3 fatty acids, not to mention that they contain at least fifteen essential vitamins and minerals, including B12 and selenium.
It is always good to know some Paleo meals, by memory alone, that are budget-friendly and easy to prepare. When you are stuck at the grocery store without a dinner plan, you can visualize a simple list of ingredients and make this your number one backup meal; just add a salad, and you are ready to go.
You can even prepare these deviled eggs ahead of time to take to your next work party, just don’t forget the bacon. All other matters of fish and fresh herbs are negotiable.
Serves: 4 Prep: 10 min Cook: 15 min
Ingredients
12 eggs
6 bacon slices
1 tbsp. Dijon mustard
1/2 tsp. paprika
Fresh parsley
Sea salt and freshly ground black pepper
Preparation
Place the eggs in a pot of cold water.
Let the water come to a boil, and immediately turn it off, let the eggs cook 12 to 15 minutes undisturbed.
Drain the water and peel the eggs under cold running water.
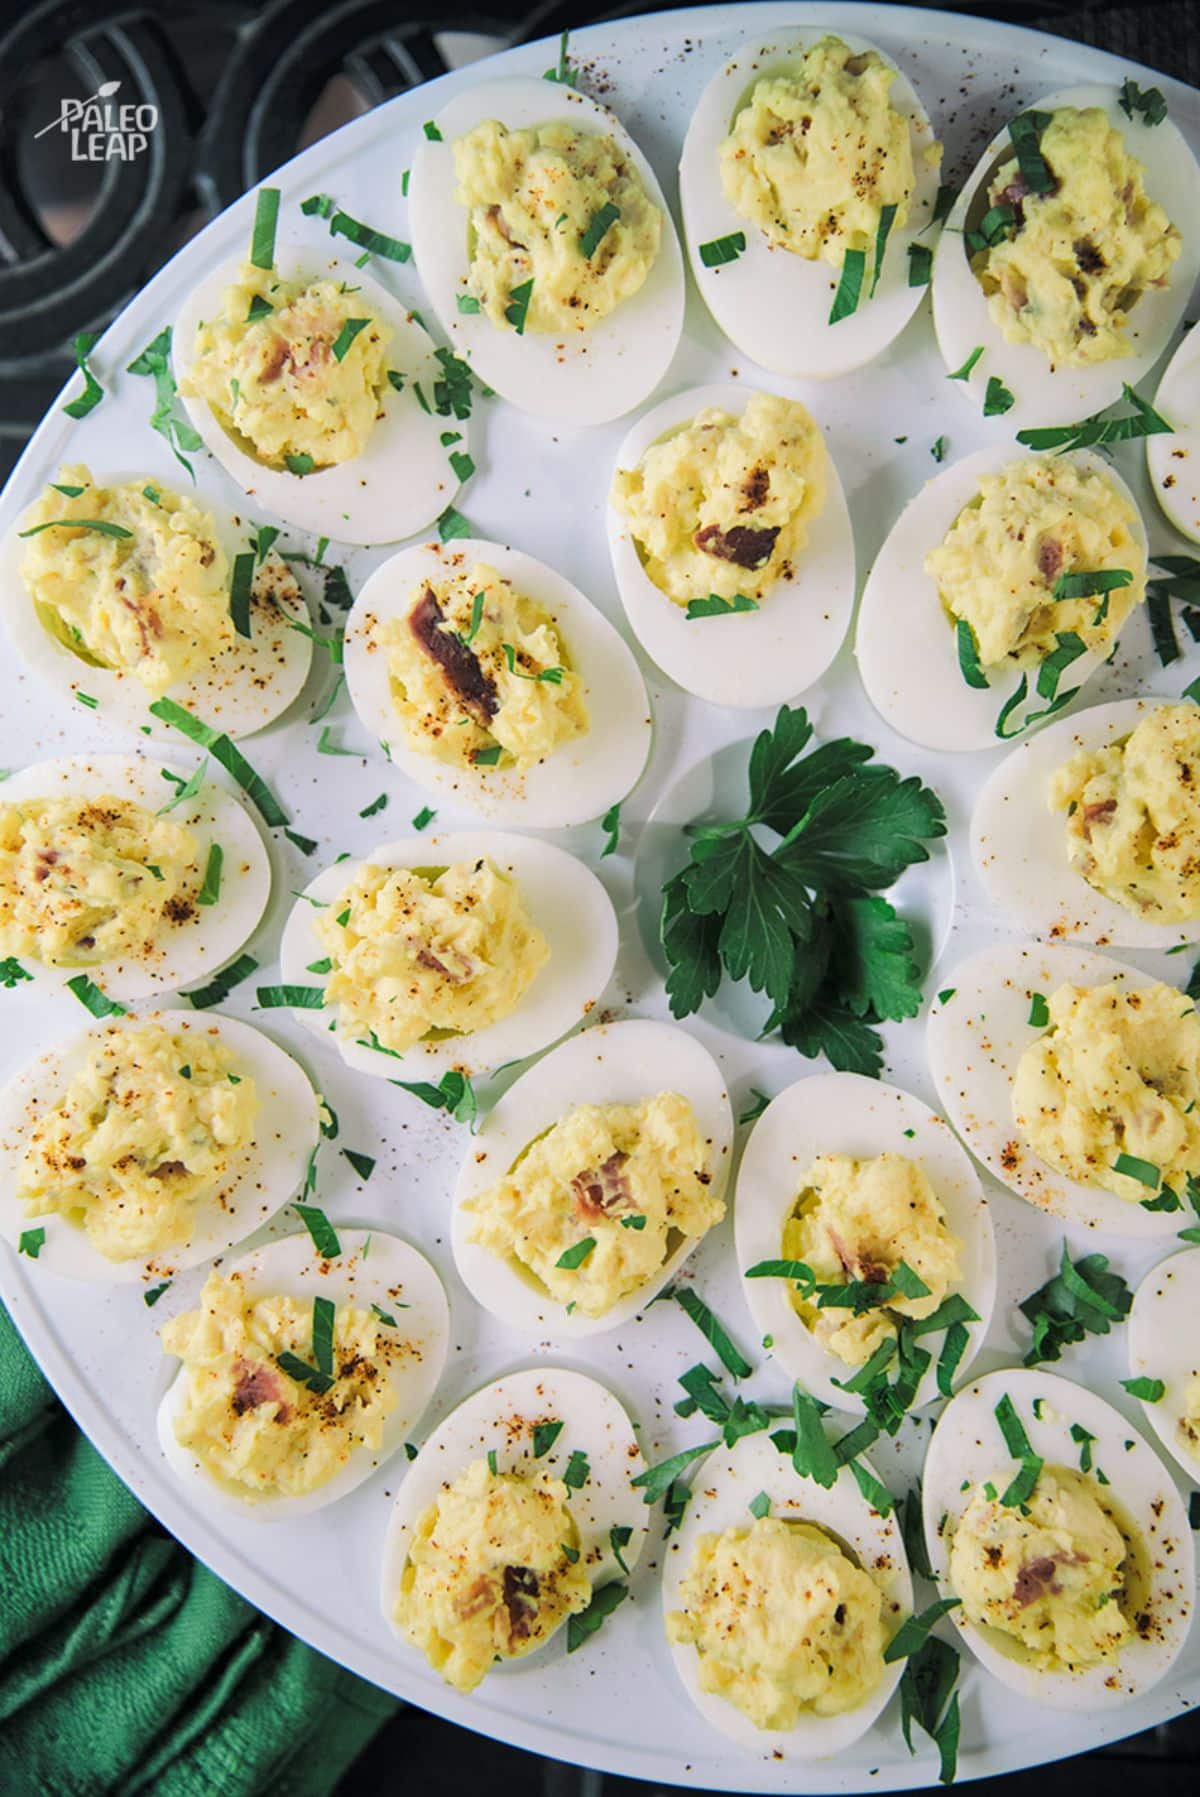
Fry the bacon over medium-high heat until crispy, about 4 to 5 minutes. Then mince the cooked bacon into tiny pieces.
Cut the eggs in half lengthwise, and remove the yolks. Place all the yolks in a medium bowl, and set the whites aside.
Mix the mayonnaise, paprika, Dijon mustard, and bacon bits with the egg yolks, stirring until creamy. Season to taste.
Fill each egg white with the yolk-bacon mixture, about 1 tbsp. in each.
To serve, sprinkle the eggs with paprika and fresh minced parsley to taste.
Print
Pin
There is something about deviled eggs with bacon that appeals to the grown-up child in all of us – eating something utterly delicious with your hands!
Keyword bacon, deviled eggs
Ingredients
eggs
bacon slices
cupmayonnaise
tbsp.Dijon mustard
tsp.paprika
Fresh parsley
Sea salt and freshly ground black pepper
Instructions
Place the eggs in a pot of cold water.
Let the water come to a boil, and immediately turn it off, let the eggs cook 12 to 15 minutes undisturbed.
Drain the water and peel the eggs under cold running water.
Fry the bacon over medium-high heat until crispy, about 4 to 5 minutes. Then mince the cooked bacon into tiny pieces.
Cut the eggs in half lengthwise, and remove the yolks. Place all the yolks in a medium bowl, and set the whites aside.
Mix the mayonnaise, paprika, Dijon mustard, and bacon bits with the egg yolks, stirring until creamy. Season to taste.
1/2 cup mayonnaise, 1 tbsp. Dijon mustard, 1/2 tsp. paprika, Sea salt and freshly ground black pepper
Fill each egg white with the yolk-bacon mixture, about 1 tbsp. in each.
To serve, sprinkle the eggs with paprika and fresh minced parsley to taste.
Nutrition
Calories: 521kcal | Carbohydrates: g | Protein: g | Fat: g | Saturated Fat: g | Polyunsaturated Fat: g | Monounsaturated Fat: g | Trans Fat: 0.1g | Cholesterol: 525mg | Sodium: 625mg | Potassium: 273mg | Fiber: 0.4g | Sugar: g | Vitamin A: IU | Vitamin C: mg | Calcium: mg | Iron: mg
We love Mexican food for a ton of reasons – it’s delicious, it’s quick to prepare, and it allows for a lot of ingredient versatility that makes Paleo-Mexican work.
While many of us think of this cuisine as laden with non-Paleo items like rice, , and tortillas, there’s so much more to work with here. With its emphasis on main course proteins, vegetables, and spices, Mexican-inspired meals add a needed kick to any Paleo diet.
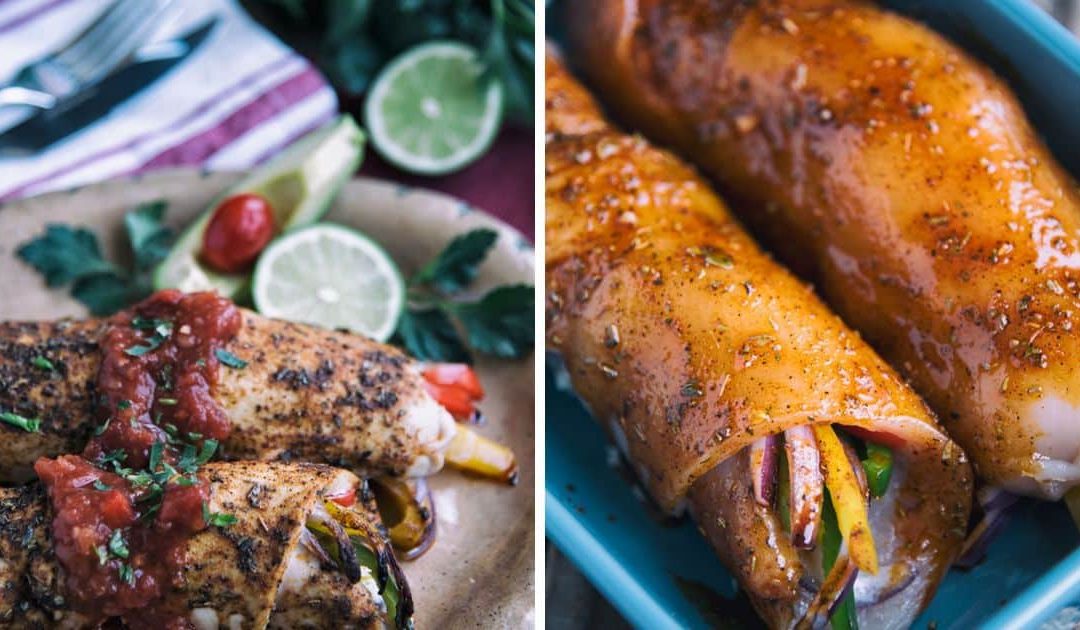
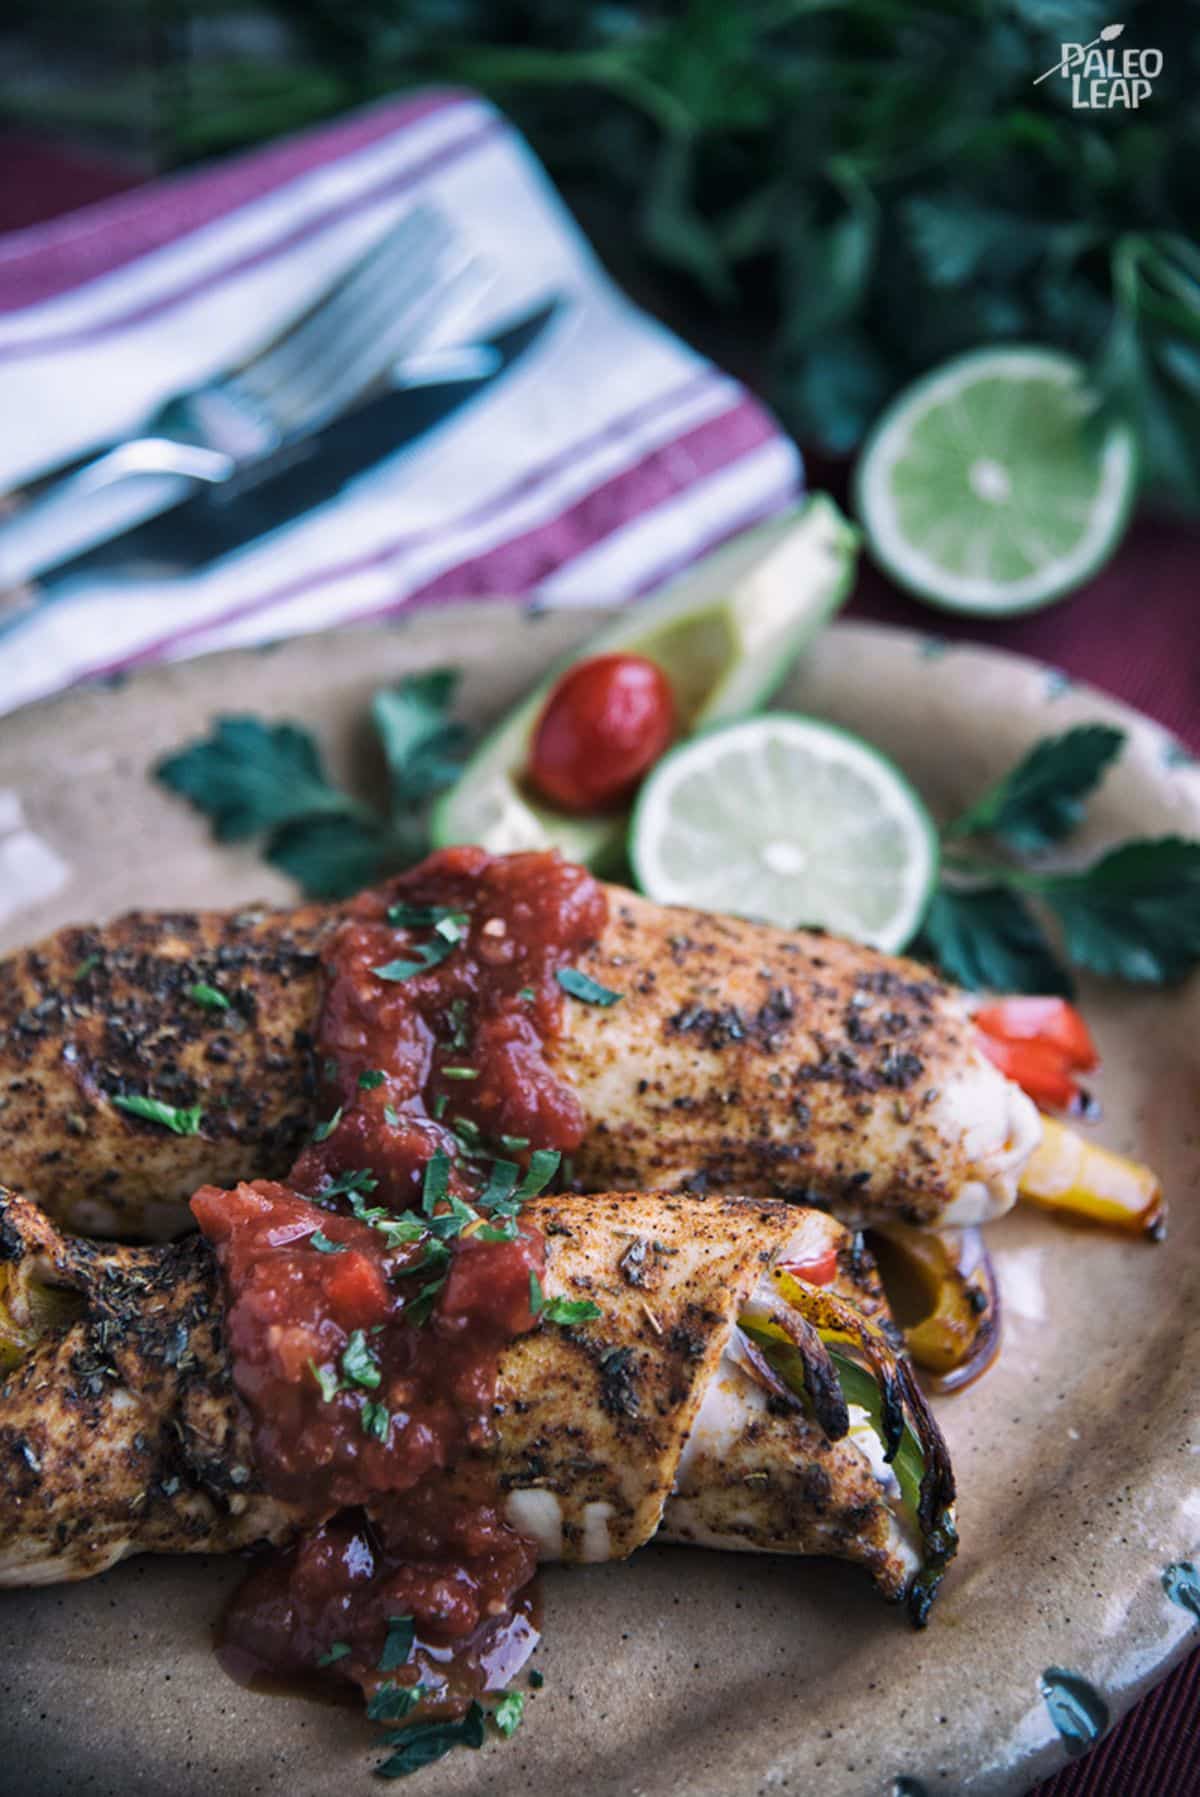
We especially love this dish because of the creative swaps made to keep things Paleo – while fajitas are normally served with tortillas, here you’ll be stuffing them into your chicken protein, creating a truly unique way to serve things up.
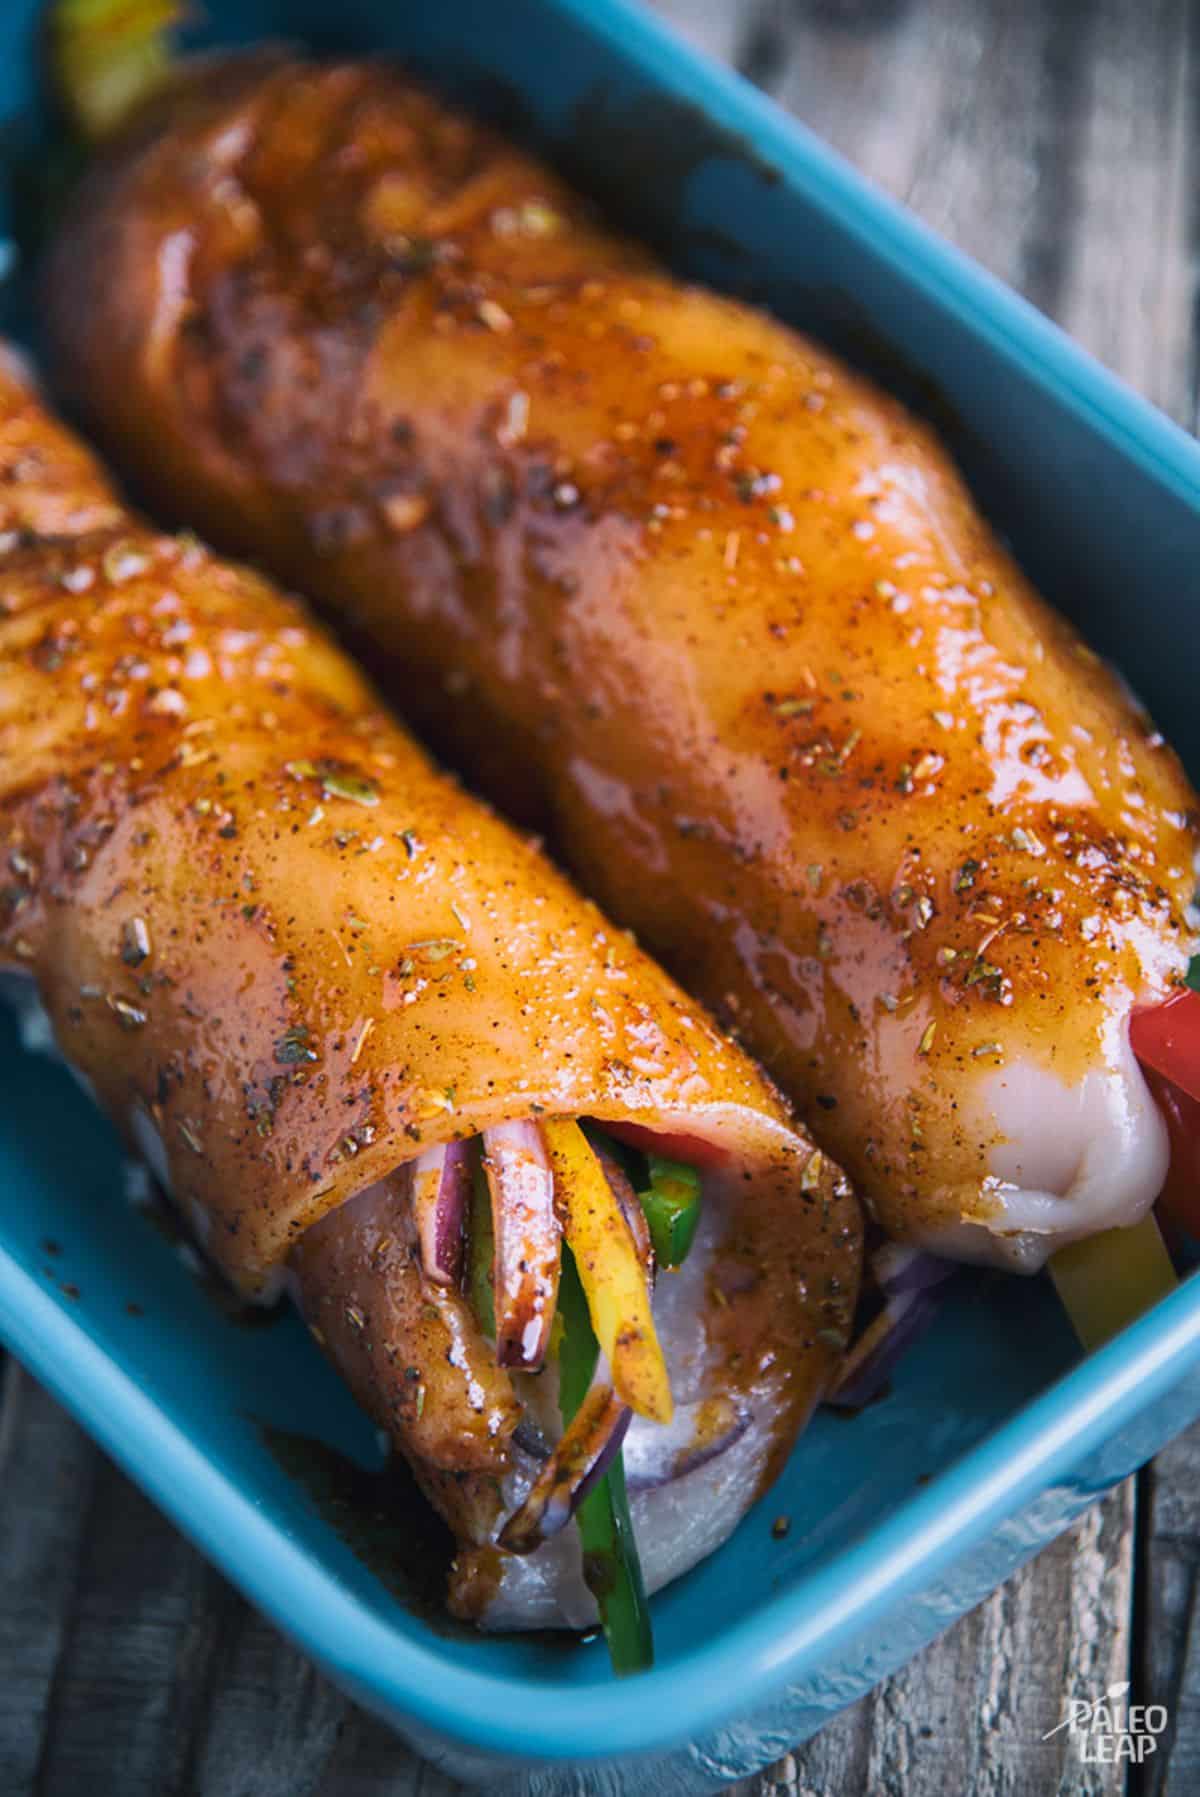
While this dish is tasty, the preparation can be a bit tricky because of the stuffed chicken element. When flattening your chicken breast, really take the time to create even layers and try to get the meat as thin as possible without breaking apart.
This will allow for more even cooking and easier stuffing. Although the use of toothpicks to secure your rolled chicken is optional, we recommend it – as you cook the rolls, the stuffing will move around a bit, and the last thing you want is empty chicken rolls when you’re done.
These fun chicken fajitas are a perfect dish for any meal, and they also work well as finger foods at a gathering.
No matter when you’re serving these, try your hand at some great dips to accompany them. While there are tons of options here, we think simple guacamole and spicy homemade salsa are a great place to start.
Serves: 4 Prep: 25 min Cook: 25 min
Ingredients
4 chicken breasts, butterflied or pounded;
1 bell pepper, sliced;
1 red onion, sliced;
Juice from 1 lime;
1/4 cup olive oil;
1 garlic clove, minced;
2 tbsp. fresh cilantro, minced;
1/2 tsp. cumin;
1 tsp. chili powder;
1 tsp. dried oregano;
¼ tsp. cayenne pepper;
Sea salt and freshly ground black pepper;
Fresh salsa;
Fresh cilantro;
Preparation
Preheat your grill to medium-high heat.
In a bowl, combine the lime juice, olive oil, garlic, fresh cilantro, cumin, chili powder, oregano, and cayenne pepper; season with salt and pepper to taste.
Mix half of the spice mixture in a bowl with the bell pepper and onion.
Lay the chicken flat and fill with the bell pepper, onion, and spice mixture.
Roll the chicken tightly, securing it with toothpicks if needed. (Soak the toothpicks in water first to prevent them from burning)
Brush the chicken with the remaining spice mixture, making sure the chicken breasts are well covered.
Grill the chicken over medium-high heat, covered, for 20 to 25 minutes, turning every 4 to 5 minutes.
Serve the chicken fajitas topped with fresh salsa and cilantro.
Print
Pin
Enjoy chicken fajitas again by removing the need for a tortilla and using your chicken as a fajita roll-up – yummy!
Ingredients
chicken breastsbutterflied or pounded
bell peppersliced
red onionsliced
Juice from 1 lime
cupolive oil
garlic cloveminced
tbsp.fresh cilantrominced
tsp.cumin
tsp.chili powder
tsp.dried oregano
¼tsp.cayenne pepper
Sea salt and freshly ground black pepper
Fresh salsa
Fresh cilantro
Instructions
Preheat your grill to medium-high heat.
In a bowl, combine the lime juice, olive oil, garlic, fresh cilantro, cumin, chili powder, oregano, and cayenne pepper; season with salt and pepper to taste.
Juice from 1 lime, 1/4 cup olive oil, 1 garlic clove, 1/2 tsp. cumin, 1 tsp. chili powder, 1 tsp. dried oregano, ¼ tsp. cayenne pepper, Fresh cilantro, Sea salt and freshly ground black pepper
Mix half of the spice mixture in a bowl with the bell pepper and onion.
1 bell pepper, 1 red onion
Lay the chicken flat and fill with the bell pepper, onion, and spice mixture.
Roll the chicken tightly, securing it with toothpicks if needed. (Soak the toothpicks in water first to prevent them from burning)
Brush the chicken with the remaining spice mixture, making sure the chicken breasts are well covered.
Grill the chicken over medium-high heat, covered, for 20 to 25 minutes, turning every 4 to 5 minutes.
Serve the chicken fajitas topped with fresh salsa and cilantro.
2 tbsp. fresh cilantro, Fresh salsa
Nutrition
Calories: 435kcal | Carbohydrates: g | Protein: g | Fat: g | Saturated Fat: g | Polyunsaturated Fat: g | Monounsaturated Fat: g | Cholesterol: 146mg | Sodium: 155mg | Potassium: 642mg | Fiber: g | Sugar: g | Vitamin A: IU | Vitamin C: mg | Calcium: mg | Iron: mg
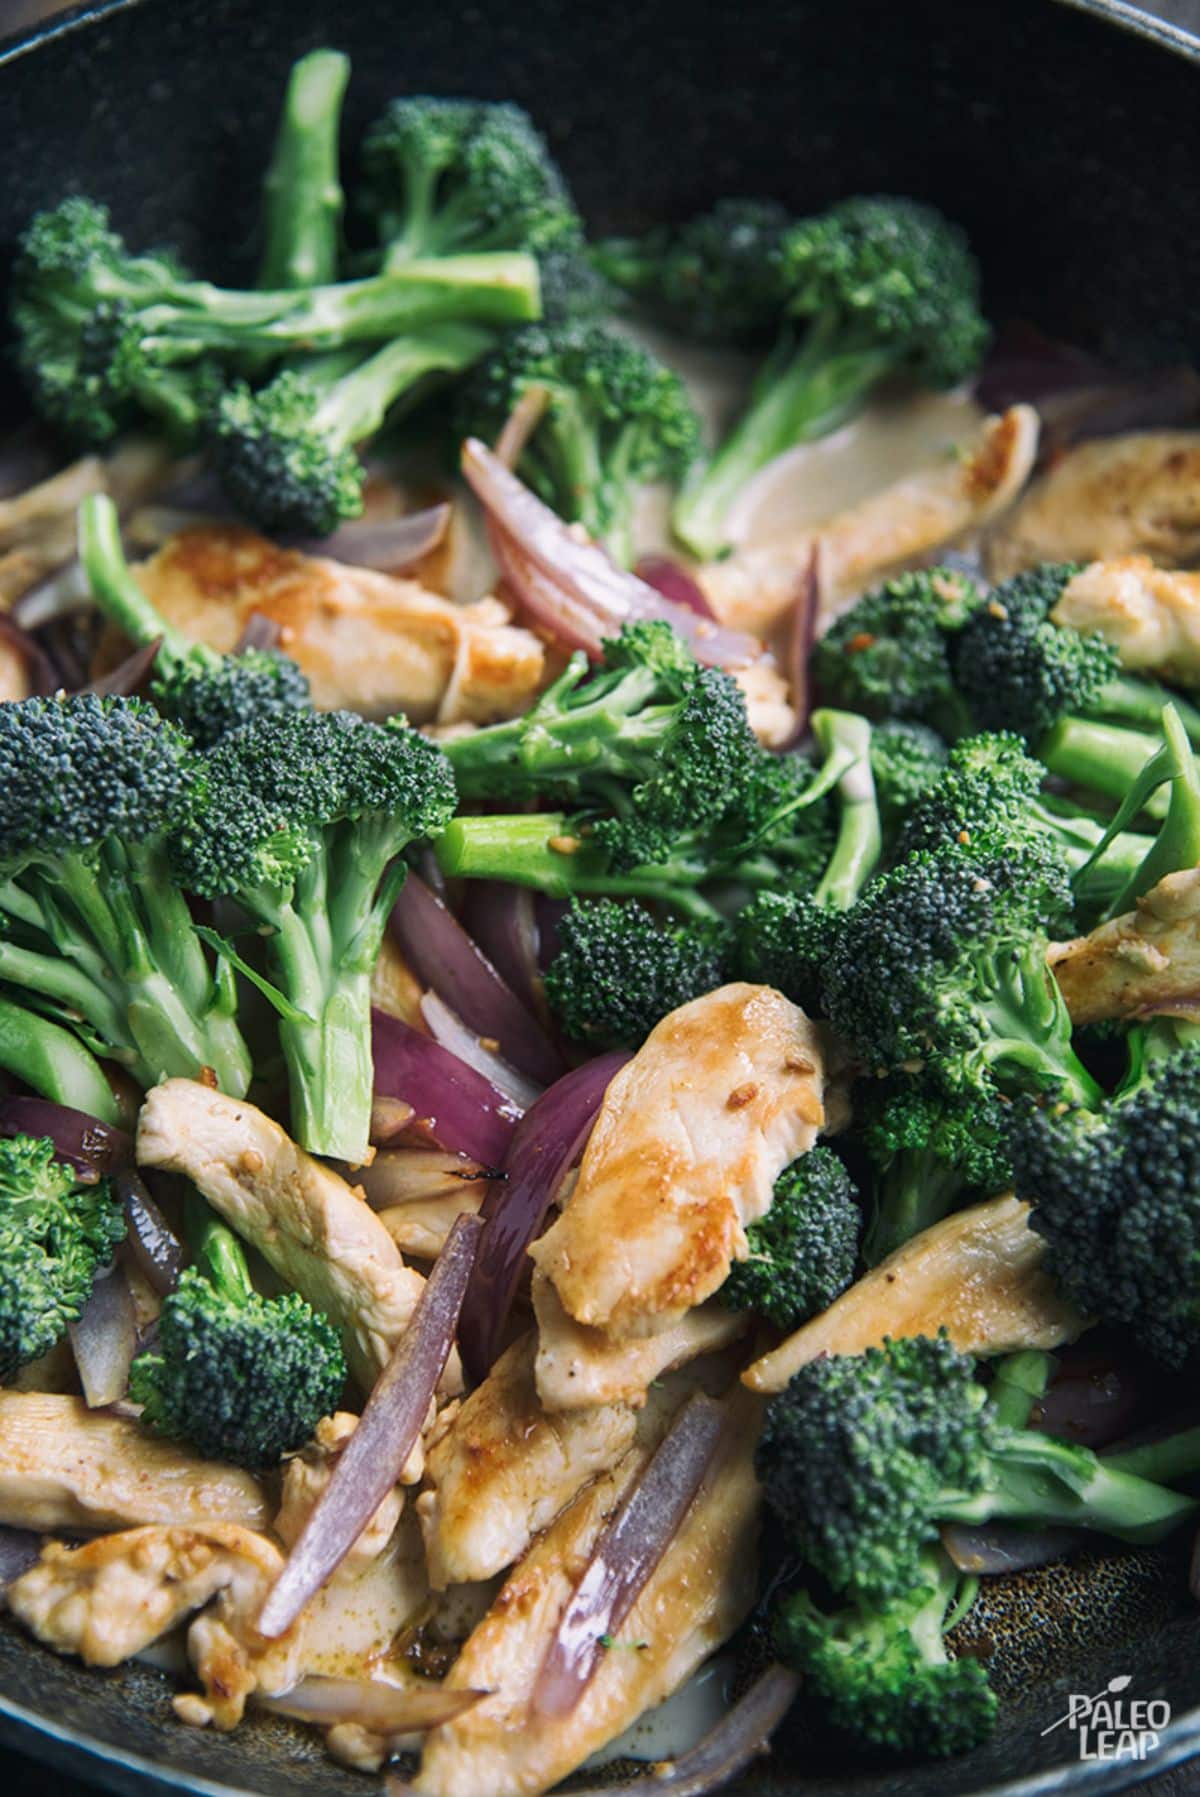
There’s a myth that truly great cooking needs to be complicated. Yes, while it’s impressive to say that dinner took hours to make or required a gadget that no one has ever heard of, we believe that awesome food and meals come from the basics – quality ingredients and great technique.
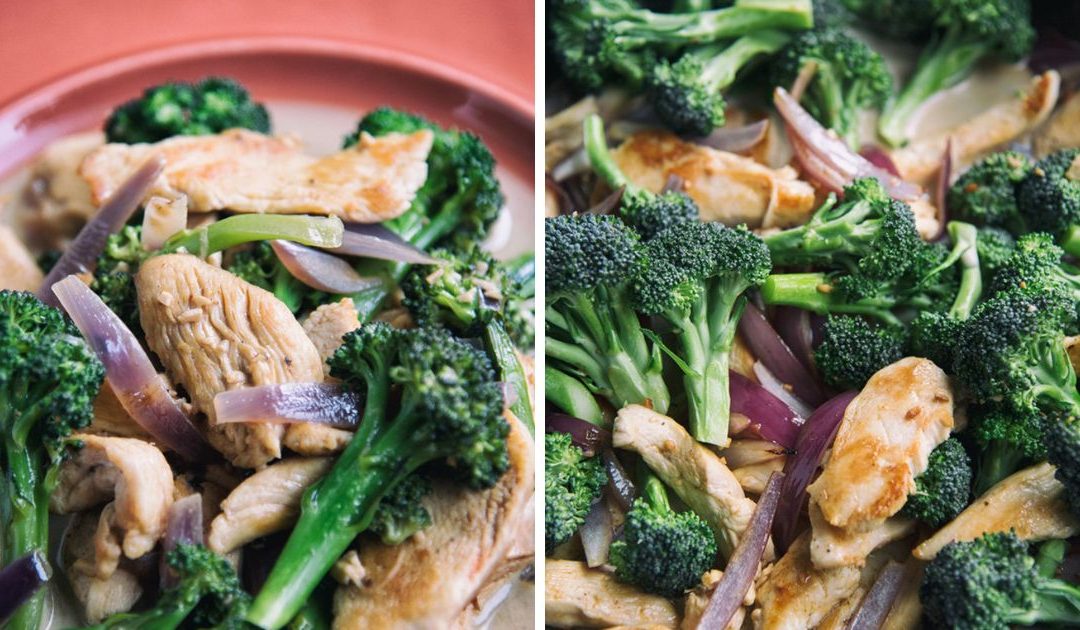
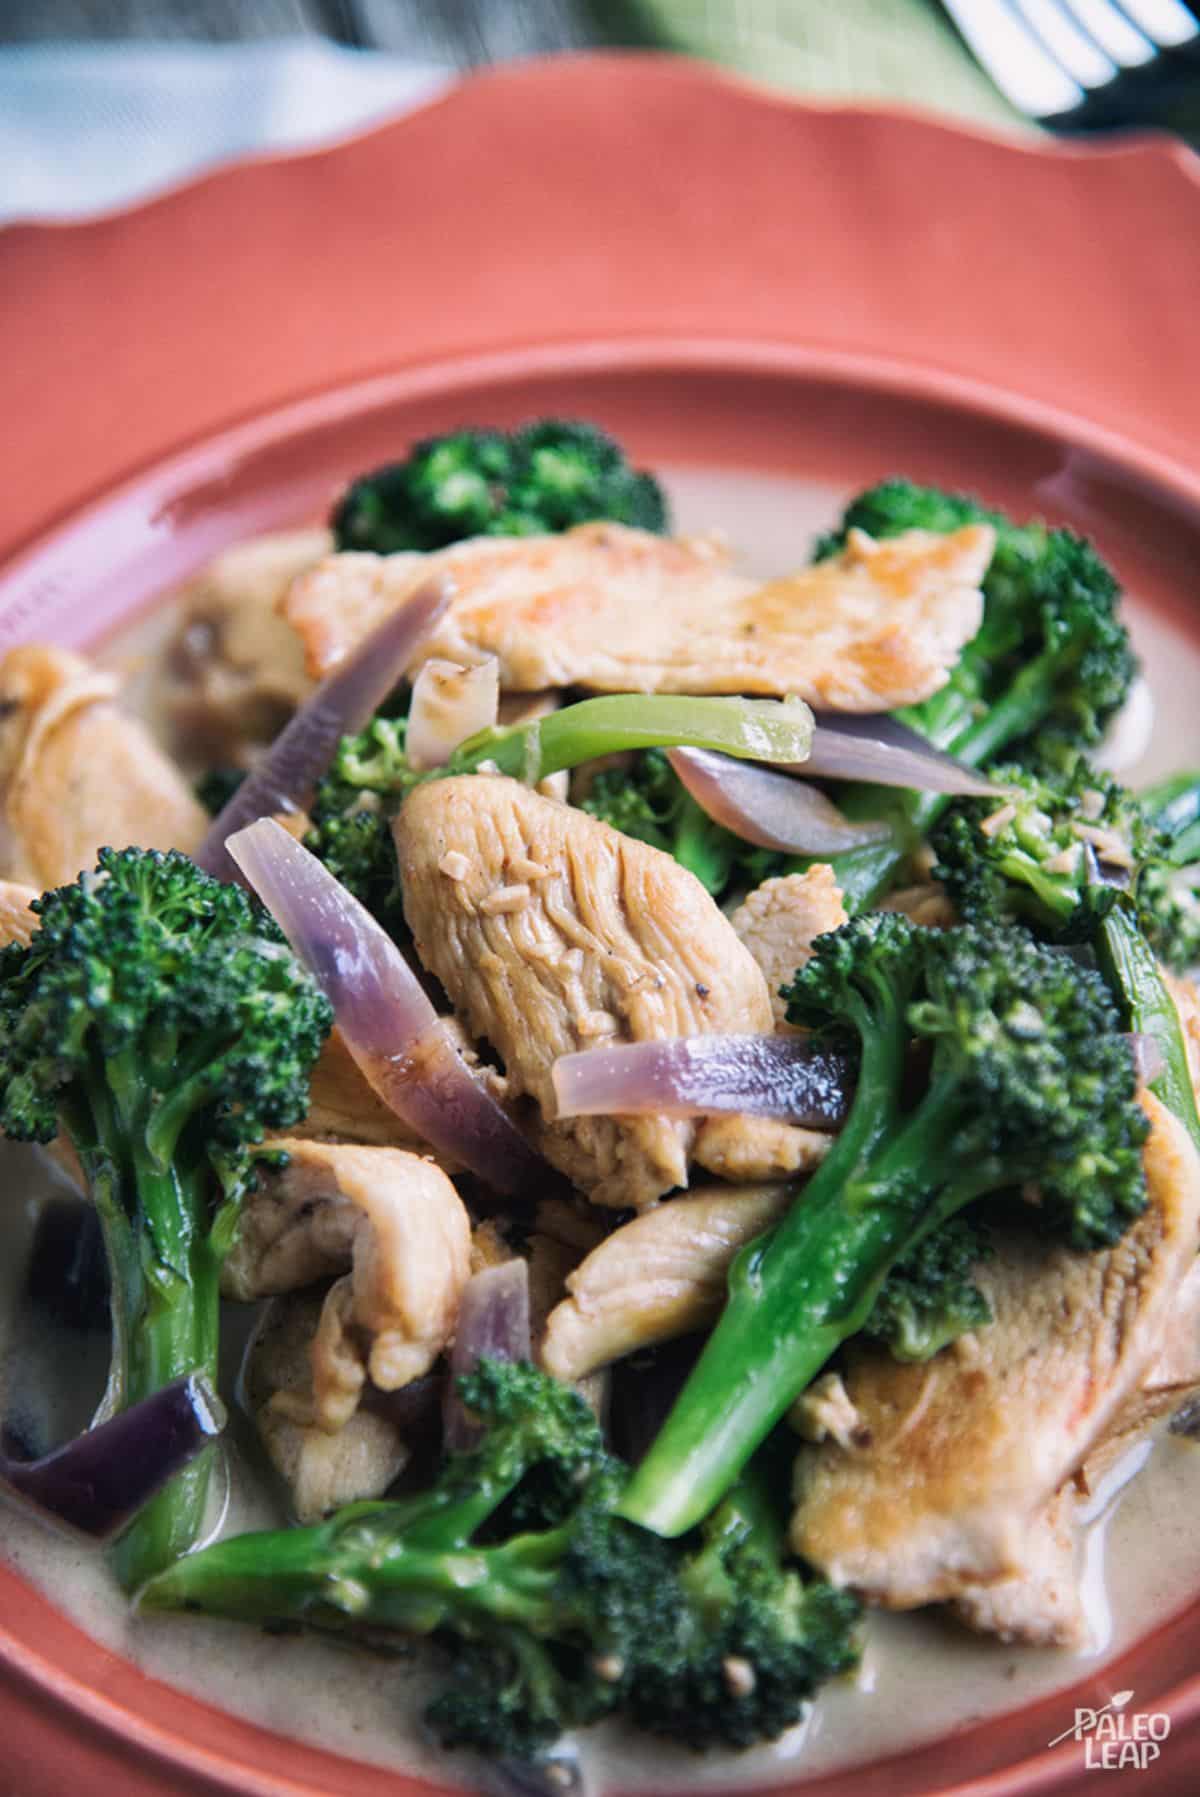
While this chicken and broccoli dish may not sound that complicated, it’s the kind of dish that works perfectly for quick nights in the kitchen where simplicity is a virtue.
This dish also has the benefit of being great for kids. While the boneless, skinless chicken breast may not be the most budget-friendly, you can easily swap out another cut of chicken if needed and adjust your preparation.
While this dish calls for a head of broccoli, you can also make substitutions here to your preference. Broccoli falls into the brassica category, meaning it shares a pretty similar nutritional profile to things like cauliflower, cabbage, and kale.
While brassicas are great for their micro-nutrient content, they are frequently high in FODMAPs, so beware if you are prone to issues such as gas or bloating when you eat these kinds of foods.
While this dish works perfectly as a light main course, if you are serving this to children, it may work a bit better to incorporate cauliflower rice or mashed potatoes. This rounds out the dish and helps soak up some of the extra garlic sauce!
Serves: 4 Prep: 15 min Cook: 20 min
Ingredients
2 chicken breasts, boneless and skinless, sliced;
1 broccoli head, cut into florets;
1 red onion, sliced;
4 garlic cloves, minced;
1 cup coconut milk;
1/2 cup chicken stock;
1 tsp. paprika;
2 tbsp. ghee;
Sea salt and freshly ground black pepper;
Preparation
Season the chicken breast to taste with sea salt and freshly ground black pepper.
Melt ghee in a skillet over medium-high heat.
Brown the chicken on both sides for 4 to 5 minutes and set aside.
Add the onion, garlic, and broccoli to the skillet and cook until soft, about 4 to 5 minutes.
Pour in chicken stock and cook while stirring and scraping the bottom of the pan.
Add the chicken back to the pan, pour in the coconut milk, sprinkle the paprika, and adjust the seasoning to taste.
Stir everything well and cook another 4 to 5 minutes.
Print
Pin
Looking for a quick and simple chicken main course that’s Paleo and kid-friendly? We have the perfect dish for you.
Keyword broccoli, chicken, creamy, garlic
Ingredients
chicken breastsboneless and skinless, sliced
broccoli headcut into florets
red onionsliced
garlic clovesminced
cupcoconut milk
cupchicken stock
tsp.paprika
tbsp.ghee
Sea salt and freshly ground black pepper
Instructions
Season the chicken breast to taste with sea salt and freshly ground black pepper.
Melt ghee in a skillet over medium-high heat.
Brown the chicken on both sides for 4 to 5 minutes and set aside.
Add the onion, garlic, and broccoli to the skillet and cook until soft, about 4 to 5 minutes.
1 red onion, 4 garlic cloves, 1 broccoli head
Pour in chicken stock and cook while stirring and scraping the bottom of the pan.
Add the chicken back to the pan, pour in the coconut milk, sprinkle the paprika, and adjust the seasoning to taste.
1 cup coconut milk, 1 tsp. paprika, Sea salt and freshly ground black pepper
Stir everything well and cook another 4 to 5 minutes.
Nutrition
Calories: 399kcal | Carbohydrates: g | Protein: g | Fat: g | Saturated Fat: g | Polyunsaturated Fat: g | Monounsaturated Fat: g | Cholesterol: mg | Sodium: 167mg | Potassium: 937mg | Fiber: g | Sugar: g | Vitamin A: IU | Vitamin C: 139mg | Calcium: 110mg | Iron: mg
One of the things we run into, as we’re sure many of you do as well, is the tendency to fall into the same pattern meal after meal. This might mean a salad plus protein for lunch or finding ourselves making large protein main courses for dinner every night and living off the leftovers throughout the week.
While it’s great to find comfort in your food, inviting some change is also important – it keeps things interesting!
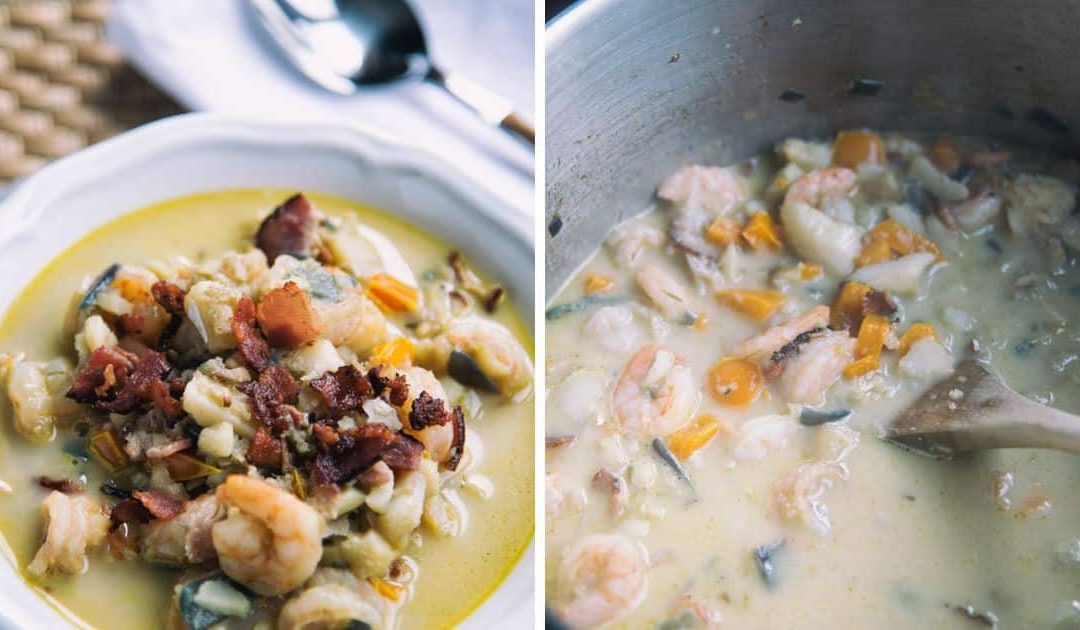
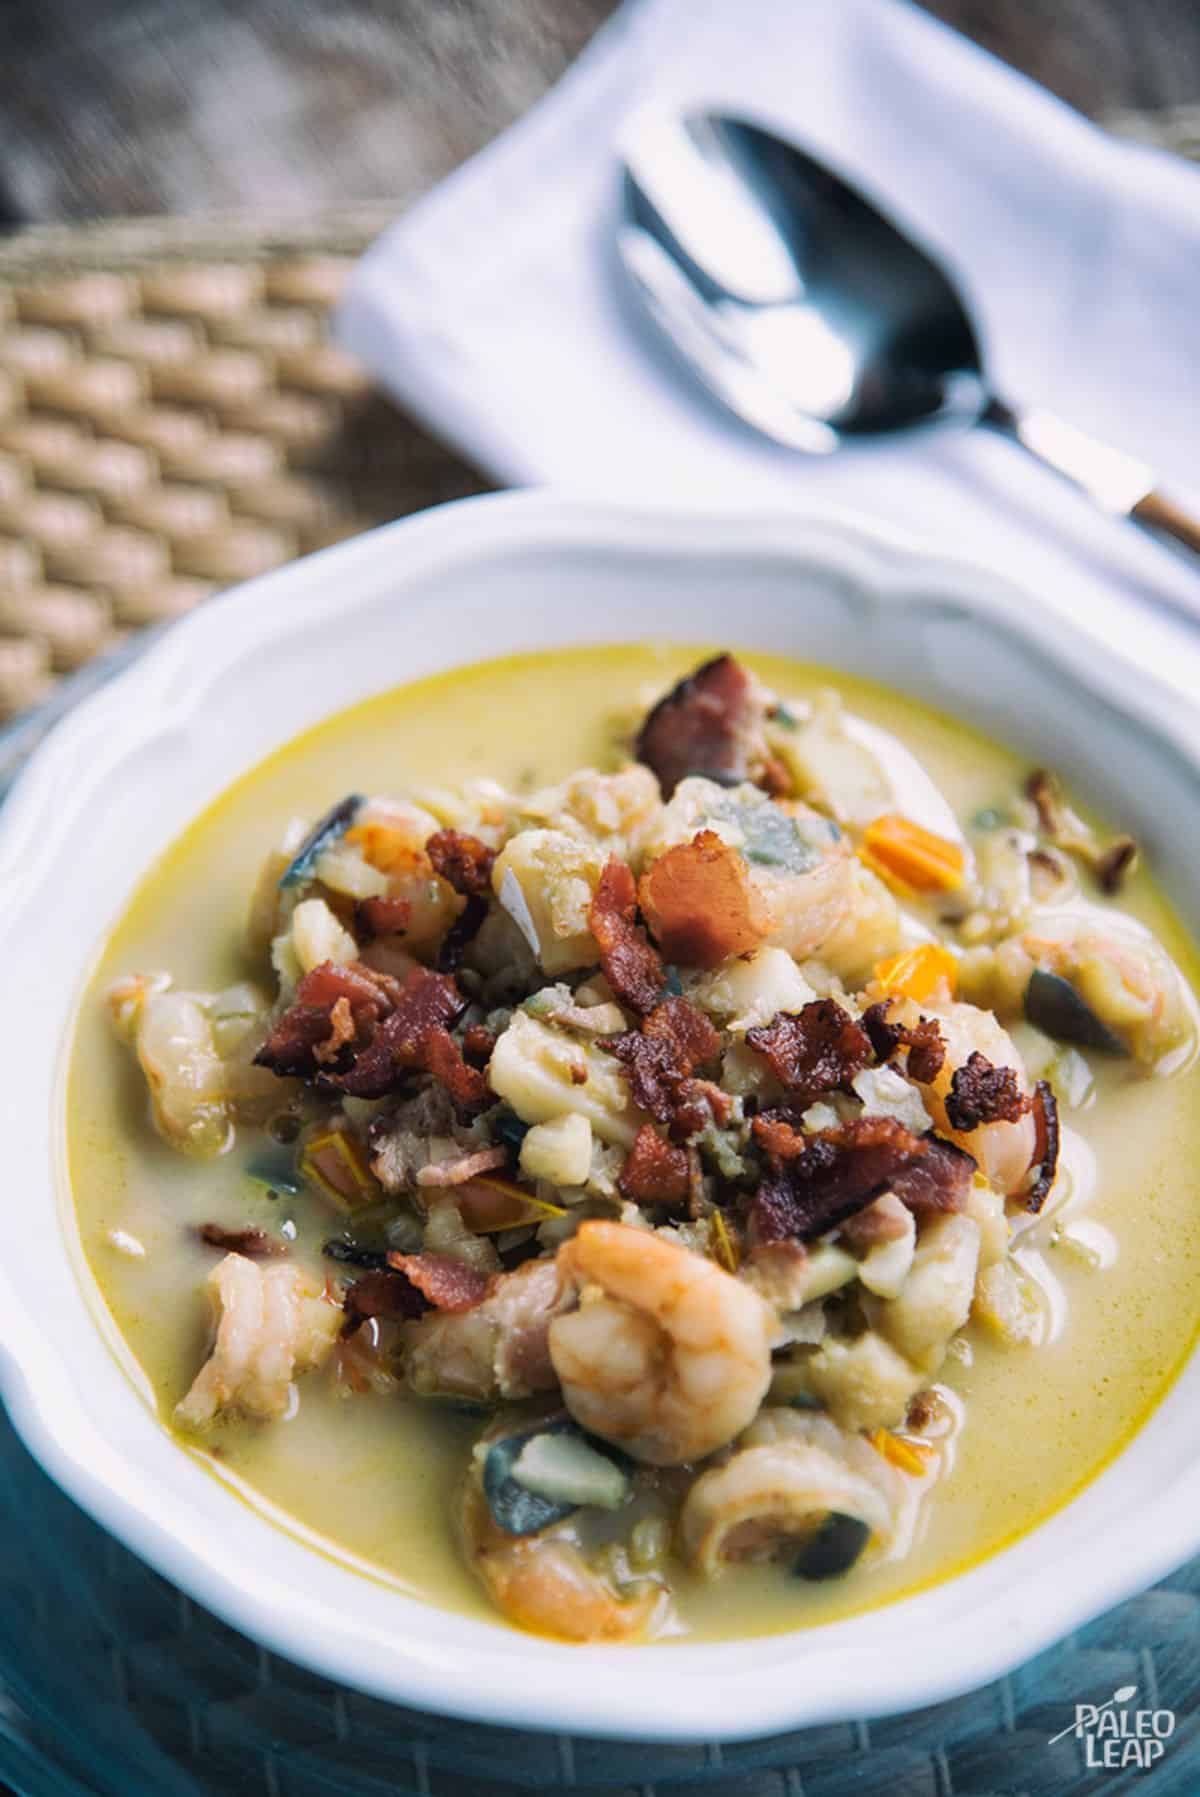
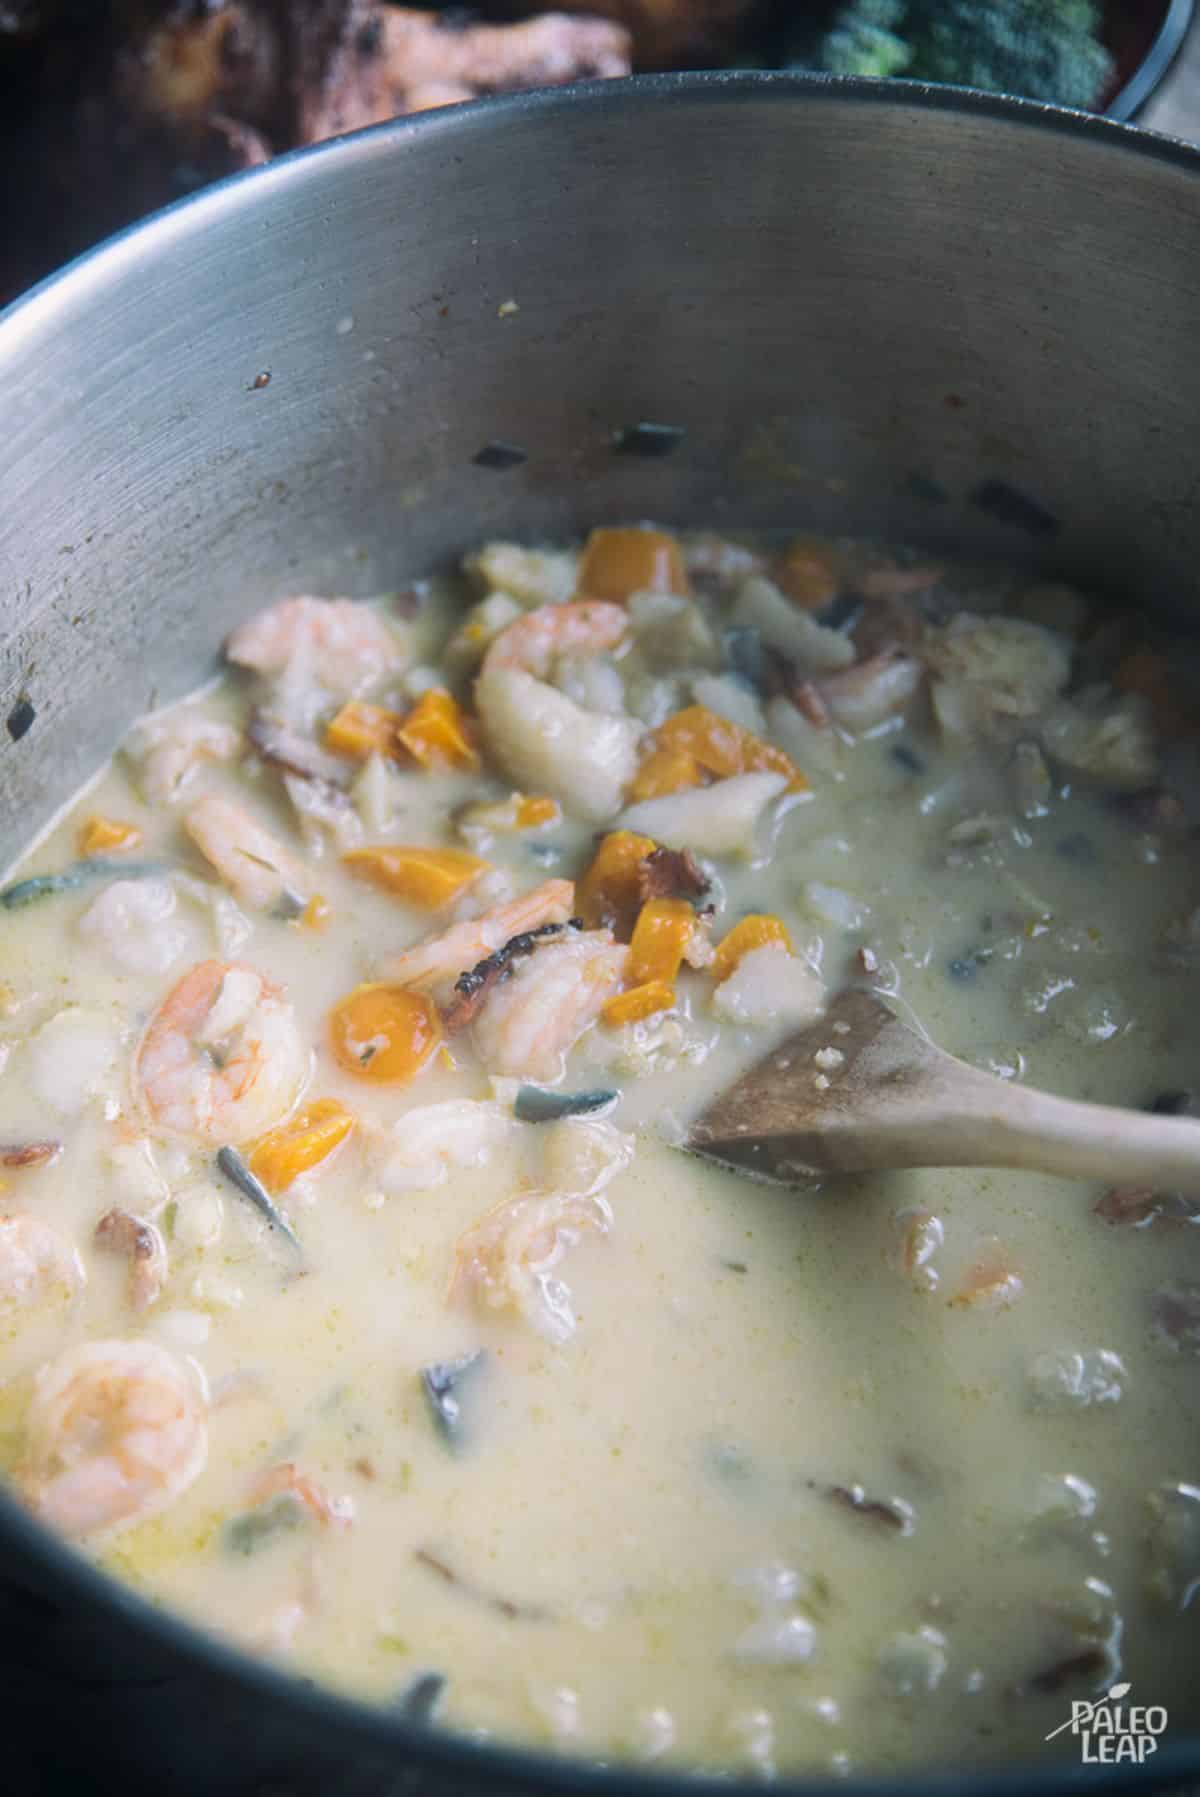
One of the ways we love to do this is to venture outside of our normal routine and try something like this dish – a fish and bacon chowder that’s perfect as a main course for dinner, making and freezing for lunch, or as one piece of a larger meal.
This dish incorporates some of the best Paleo ingredients to create a chowder that’s simple and quick to prepare.
You’ll definitely have some freedom here to pick the seafood ingredients that work best for your budget – for example, while peeled and deveined shrimp is much easier to work with, if you have the time to complete this yourself, you’ll save some money by purchasing your shrimp without these removed.
As always, remember to consider the source of your seafood and take the time to learn about what you’re buying.
While this chowder is perfect as a light, stand-alone course, we think pairing this dish with a salad really rounds out the meal. Try this grilled eggplant and sun-dried tomato salad for a great complement to the flavors of your chowder.
Serves: 4 Prep: 20 min Cook: 25 min
Ingredients
1 lb. raw shrimp, peeled and deveined;
2 lbs. haddock fillets, diced; (or other firm-fleshed fish fillets)
1 bell pepper, diced;
4 bacon slices, cooked and crumbled;
1 onion, diced;
2 cups chicken stock;
1 1/2 cups coconut milk;
2 garlic cloves, minced;
2 tsp. paprika;
1 tsp. dried thyme;
Cooking fat;
Sea salt and freshly ground pepper, to taste;
Preparation
Heat cooking fat in a saucepan over medium heat.
Add the onions and garlic and cook for 4 to 5 minutes or until the onions are translucent.
Add in the shrimp, bell pepper, and fish; cook everything for 4 to 5 minutes while stirring.
Add thyme, paprika, sea salt, and freshly ground pepper to taste, frequently stirring for 2 minutes.
Deglaze the saucepan by adding the chicken stock and scraping the bottom.
Poor in the coconut milk and bring to a boil; then, lower heat to medium-low.
Simmer for 12 to 15 minutes; serve garnished with crumbled bacon.
Print
Pin
Looking for a soup that really changes things up? Try this amazing twist on fish chowder!
Keyword bacon, fish chowder, shrimp
Ingredients
lb.raw shrimppeeled and deveined
lbs.haddock filletsdiced; (or other firm-fleshed fish fillets)
bell pepperdiced
bacon slicescooked and crumbled
oniondiced
cupschicken stock
1 1/2cupscoconut milk
garlic clovesminced
tsp.paprika
tsp.dried thyme
Cooking fat
Sea salt and freshly ground pepperto taste
Instructions
Heat cooking fat in a saucepan over medium heat.
Add the onions and garlic and cook for 4 to 5 minutes or until the onions are translucent.
Add in the shrimp, bell pepper, and fish; cook everything for 4 to 5 minutes while stirring.
1 lb. raw shrimp, 1 bell pepper, 2 lbs. haddock fillets
Add thyme, paprika, sea salt, and freshly ground pepper to taste, frequently stirring for 2 minutes.
2 tsp. paprika, 1 tsp. dried thyme, Sea salt and freshly ground pepper, 1 bell pepper
Deglaze the saucepan by adding the chicken stock and scraping the bottom.
Poor in the coconut milk and bring to a boil; then, lower heat to medium-low.
Simmer for 12 to 15 minutes; serve garnished with crumbled bacon.
Nutrition
Calories: 582kcal | Carbohydrates: g | Protein: g | Fat: g | Saturated Fat: g | Polyunsaturated Fat: g | Monounsaturated Fat: g | Trans Fat: 0.1g | Cholesterol: 283mg | Sodium: mg | Potassium: mg | Fiber: g | Sugar: g | Vitamin A: IU | Vitamin C: mg | Calcium: 146mg | Iron: mg