by Daniela Haynes | Dec 14, 2022 | Nutrition & Healthy Recipes
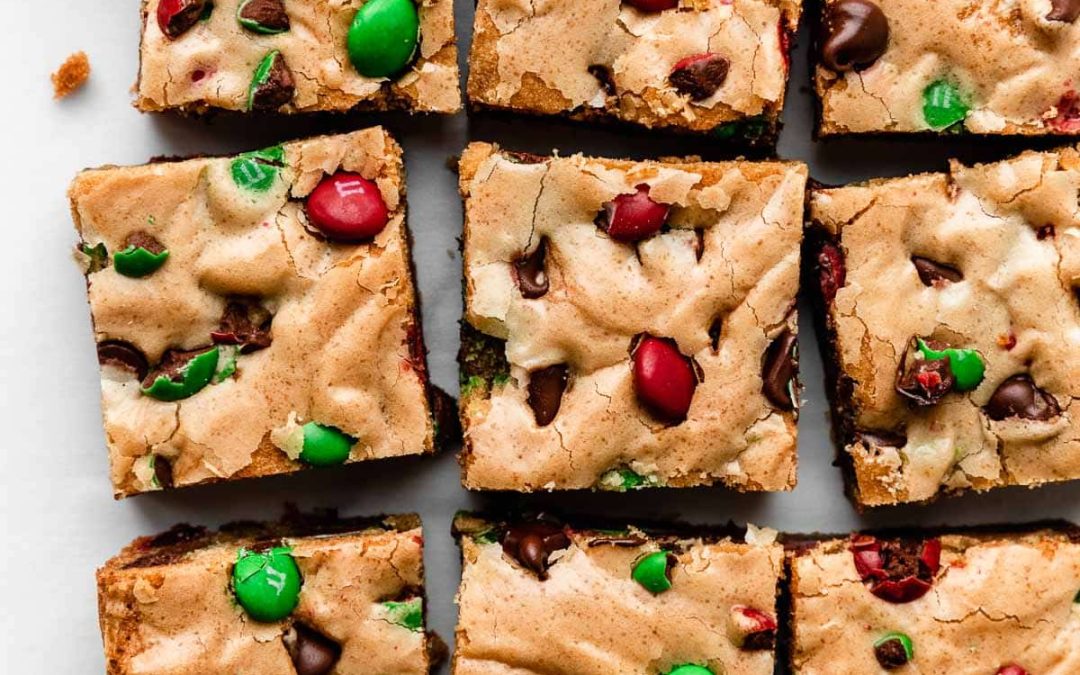
These extra soft and chewy M&M cookie bars are so easy to make—no mixer, no dough chilling, no individual dough rolling required! You can use a mix of regular and mini M&Ms and chocolate chips for texture variety, and change out the colors to make them festive for a holiday.
Finally a cookie recipe without chilling!
Let’s call these no-chill, no-roll M&M cookies! When you need a big batch of cookies but are pressed for time (or mental energy, LOL), cookie bars are the solution. This recipe makes a generously sized 9×13-inch pan of M&M cookie bars, perfect for sharing, especially at the holidays. Kids love these, but so do adults. Seriously, aside from special diets, have you ever met anyone who would turn down a chewy chocolate chip M&M cookie bar? I’m pretty sure I haven’t!
Here’s Why You’ll Love These M&M Cookie Bars
- Like a bigger batch of soft chocolate chip cookie bars—with colorful M&M candies!
- Makes a large pan to serve a crowd.
- A great recipe for young bakers to help with.
- No mixer, no dough chilling, no dough ball rolling—no fuss!
- Soft in the center, crisp around the edges.
- As easy as a box mix, but way more delicious.
- Add chocolate chips or white chocolate chips for texture variety.
- Choose your color M&Ms to match a holiday or theme.
Unlike these soft-baked M&M cookies, there’s no dough chilling or rolling dough into individual balls and baking in batches. The only waiting you’ll have to suffer through is for the pan to cool for 1 hour before you cut them into bars. (I know, I’m sorry.)
Unlike these soft-baked M&M cookies, there’s no dough chilling or rolling dough into individual balls and baking in batches. The only waiting you’ll have to suffer through is for the pan to cool for 1 hour before you cut them into bars. (I know, I’m sorry.)
Easy Ingredients, No Mixer
Like with these favorite chewy chocolate chip cookies, using melted butter makes for the softest, chewiest bar cookies. I usually like to use melted butter in bar recipes like brownies and blondies because the bars taste chewy, not cakey. I tested this recipe with creamed softened butter, and the baked result ended up looking more like a puffy sheet cake.
Using melted butter also means you don’t need an electric mixer to make these bar cookies, AND you get that shiny, crackled look on top similar to brownies.
This recipe is similar to the Super Chewy Chocolate Chip Cookie Bars on page 28 of Sally’s Cookie Addiction, but I reduced the sugar a bit, since M&Ms are so sweet. We’re doing away with the extra egg yolk, and instead ensuring softness with an extra 1/2 teaspoon of cornstarch.
It’s also similar to my smaller recipe for chocolate chip cookie bars, but scaled up to make a full 9×13 pan. Here’s everything you need:
Have I Mentioned No Dough Chilling?
Just melt, mix, press, and bake! Chant it in your head while you get out the ingredients. Melt, mix, press, bake! Melt, mix, press, bake! No dough chill! No dough chill!
The dough will be slick from the melted butter, but should be easy enough to spread/press into the pan. In fact, it doesn’t even look like regular cookie dough and you might remember that from a batch of these chewy chocolate chip cookies. Before & after adding your add-ins:
I strongly recommend lining the baking pan with parchment paper (with overhang on the sides) to make cutting into bars easier. Spread the dough into the pan:
It’s almost gooey-like, so it’s easier to spread than regular, creamy-thick cookie dough. Bake for just 26–30 minutes and avoid over-baking:
I press a few more M&Ms and chocolate chips into the tops of the warm cookie bars, for looks. This is optional. Cool the bars for 1 hour inside the pan, then simply lift the whole thing out using the parchment paper lining. Set it onto a cutting board and slice. They’ll still be a bit warm and that’s fine!
Success Tips for M&M Cookie Bars
Feel Free to Pipe Some Buttercream Decor
These M&M cookie bars are fabulous on their own, but then again, a little frosting is always a good idea. My favorite chocolate buttercream is far from basic; it’s incredibly creamy, silky, smooth, and rich. Even though it’s wonderfully creamy, it holds its shape well, and is perfect for piping. It makes a delicious and beautiful finishing touch on this chocolate chip cookie cake, and would have the same effect on these cookie bars if you want to add some flair!
Sally’s Cookie Palooza
This recipe is part of my annual cookie countdown called Sally’s Cookie Palooza. It’s the biggest, most delicious event of the year! Browse dozens of cookie recipes over on the Sally’s Cookie Palooza page including:
- Make Ahead & Freezing Instructions: You can make the cookie dough and chill it in the refrigerator for up to 3 days or freeze for up to 3 months. Allow to come to room temperature and continue with step 4. Baked cookie bars freeze well for up to 3 months. Thaw bars overnight in the refrigerator and bring to room temperature before serving.
- Special Tools (affiliate links): 9×13-inch Baking Pan or this one | Heavy-Duty Whisk
- Cornstarch: If you don’t have cornstarch, you can leave it out. The cookie bars will still be soft.
- Butter: Avoid letting the melted butter cool for too long, otherwise your dough will be crumbly instead of soft (and your cookie bars can end up cakey). You want it still warm, but not hot enough to begin cooking the eggs.
- M&Ms: You can use regular-size, mini, or a mix of both. I like to crush some of them, too, to sprinkle on the top before baking. Totally optional!
- Do I have to add chocolate chips? You can skip the chocolate chips. If you skip them, increase M&Ms to 1 and 1/2 cups (about 300g). You could also replace the chocolate chips with white chocolate chips, butterscotch chips, or peanut butter chips.
- 9-Inch Square Pan: To make a smaller 9-inch pan of cookie bars, use this similar scaled down recipe. For the add-ins, use 1 cup (200g) of M&Ms and 1/2 cup (90g) chocolate chips.
Keywords: M&M cookie bars
Are you new to this website? This email series is a great place to start. I’ll walk you through a few of my most popular recipes and show you exactly why they work.
have made your oatmeal chocolate chip, your lemon ginger (surprise favorite from last year) raspberry almond cream cheese cookies (apricot cream cheese, but subbed in raspberry and sliced almonds. and i will definitely make these too ! Thank you for the ease of this one !! I only trust YOUR recipes for cookies !!! Thank you for all your hard work and happy holidays to you and your family !
These look great and easy! I don’t have m&ms at home. Can I use all chocolate chips?
In general, can M&ms and chocolate chips be used interchangeably? Thanks! ?
This content was originally published here.
by Daniela Haynes | Dec 14, 2022 | Nutrition & Healthy Recipes
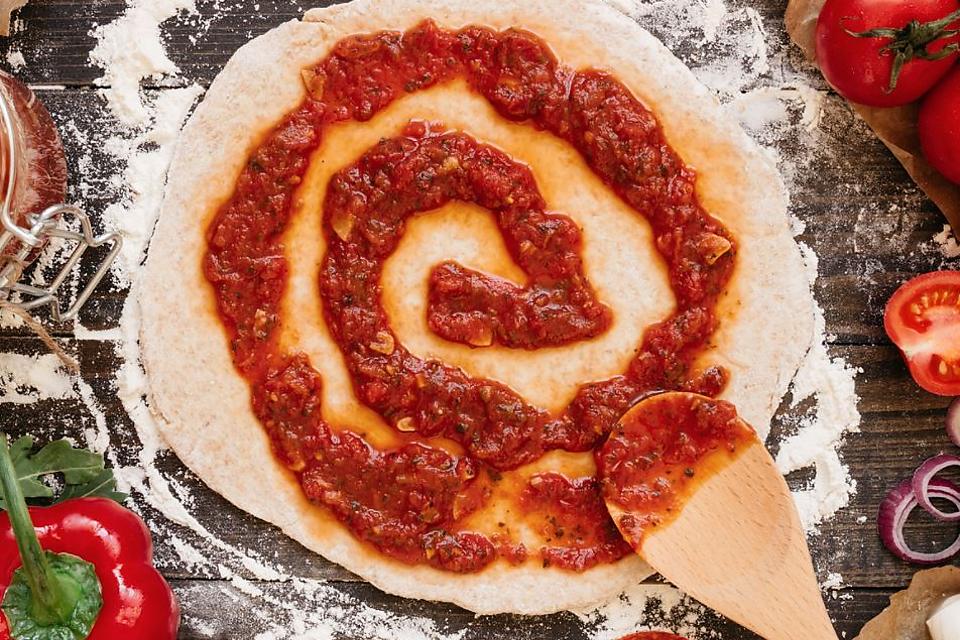
I grew up in an Italian family with weekly Italian Sunday dinners: some sort of pasta (or “macaroni”), bread, sausage and meatballs. Sometimes we’d have a simple spaghetti and other times we’d have lasagna or baked ziti, but we always had meatballs – they were always my mom’s homemade beef meatballs in her tomato sauce. I didn’t even know that other varieties of meatballs even existed!
Now that I’m older and a bit more worldy than I was as a child, I am well aware that foods exist outside of those my mom made in our kitchen. Meatballs, for instance, are made and enjoyed across the globe. But what defines a meatball? This seems to be hard to say. In the West, we typically think of meatballs as ground (or minced) meat mixed with bread or dairy. In contrast, in East Asia, meat is chopped into a paste for meatballs. I’ve learned that the type of meat doesn’t really matter; in order to qualify as a meatball, it has to end up, at least relatively, round in shape.
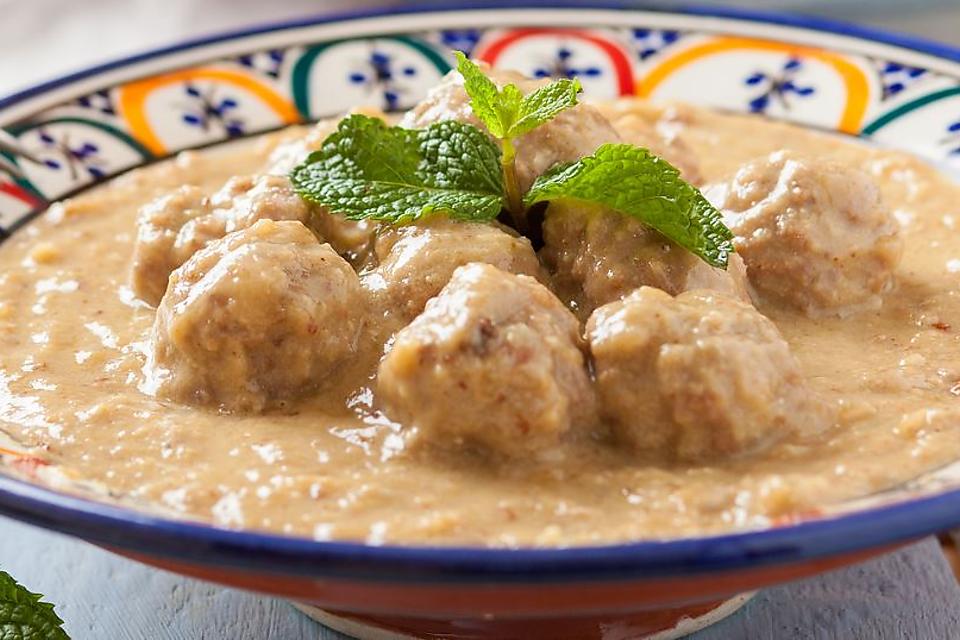
Internationally, making meatballs has been a process of stretching minimal portions of meat into something more nourishing, tasty and visually impressive. I think you’ll find that to be true with this meatball in almond sauce recipe from Spain. Serve this easy recipe as tapas or as an entrée with rice or potatoes.
Cuisine: Spanish
Prep Time: 20 minutes
Cook Time: 40 minutes
Total Time: 1 hour
Servings: 4
Meatballs
Almond Sauce
Here’s how to make it:
Note: 30Seconds is a participant in the Amazon affiliate advertising program and this post contains affiliate links, which means we may earn a commission or fees if you make a purchase via those links.
Recipe cooking times and servings are approximate. Need to convert cooking and baking measurements? Here are some . Here’s .
Take 30 seconds and , and to get recipes in your newsfeed daily.
Related Products on Amazon We Think You May Like:
30Second Mobile, Inc. is a participant in the Amazon Services LLC Associates Program, an affiliate advertising program designed to provide a means for us to earn fees by linking to Amazon.com and affiliated sites.
This content was originally published here.

by Daniela Haynes | Dec 13, 2022 | Nutrition & Healthy Recipes
Homemade Pressure Cooker Applesauce Recipe
I can nearly guarantee that once you make this homemade pressure cooker applesauce recipe that you will never buy it from a jar every again. It’s that good! I think my youngest said it best when she said it tastes like warm apple pie without the crust when it comes right out of the pressure cooker. The hardest part about this recipe is peeling the apples. The preparation is totally worth it and you can make some big batches of this and store it in these tiny wide mouth mason jars for the week. They are the perfect size for snacks.
For those of you that don’t have an electric pressure cooker yet but are interested in trying it, I highly suggest getting the Instant Pot ip-duo60 7-in-1 programmable pressure cooker seen here on Amazon. I purchased the 6 quart model because I love to make big meals ahead of time for the week. It’s the best machine I’ve ever tried.
Pressure Cooker Applesauce Ingredients
Pressure Cooker Applesauce Directions:
First we gathered all of your ingredients.
We started to peel all of the apples. My kids helped me with this part.
You can leave the peel on if you want but it will leave bits of chunky hard pieces that are a bit bitter in your applesauce. It all depends on what you like and prefer.
Remove the core of the apple. I love this apple slicer tool because it removes the core and slices them at the same time. My youngest did the prep of this apple. I went back and removed the little pieces of peel that you see on it.
This recipe is very forgiving. I’ve used the same recipe with 7 apples and again with 12 apples. Seven apples makes about 10 small jars of applesauce when I filled them all the way up in the wide mouth mason jelly jar.
Now add the apples, cinnamon, water, sugar and vanilla to your electric pressure cooker.
You will set the vent to seal and manually set the timer for 5 minutes. It takes about 10 minutes (or so) for your pressure cooker to heat up. When it’s done cooking you can do a quick release and carefully remove the lid once all the pressure is done.
This doesn’t look really pretty when it’s done but your house will smell amazing and the whole family will be drooling waiting for you to say it’s ready!
At this point I grabbed a bender and quickly blended it for about 2 minutes or so. Careful thought because it’s really hot when it first comes out of the pressure cooker. If you like it chunky you can use a potato masher or even a large spoon with wholes to mix it. These apples are so soft that they will mix very easily. If you like it smooth I suggest using a hand blender. This is where my immersion hand blender comes in handy.
This photo was taking right after I blended it and added it to the jar. You can see the bits of cinnamon in it and it tastes live Heaven on Earth!
If you enjoy electric pressure cooker recipes be sure to stay tuned. I am stepping out of my comfort zone later today and I plan to attempt a try at making some Mexican Rice the old fashioned way but in my pressure cooker. Fingers crossed it turned out. Be sure to follow our Pressure Cooker recipes board on Pinterest here too.
Feel free to Pin It on Pinterest with this photo for later:
This content was originally published here.